TAKE-OFF! Part 1: Using Beaver Builder
Welcome to TAKE-OFF! A series of articles about using Beaver Builder with your WordPress-based website.
This first post is an introduction to the Beaver Builder products and will give you an overview of the purchasing options, capabilities and technical aspects of both the plugin and theme. Follow the links in the sidebar to access additional resources. Let’s get started…
What is Beaver Builder?
Beaver Builder is a WordPress plugin and an optional theme that you can install on your website. Both the plugin and theme are installed just like any other WordPress plugin or theme. The plugin, otherwise known as a drag and drop page builder enables you to edit the content of pages on the front end of your website. Drag and drop page builders are becoming common place but Beaver Builder is definitely the best choice for a number of reasons:
- Superb support
- Easy drag and drop front page editing
- No messy shortcodes if you uninstall the plugin
- You can make a start quickly with temaplates and re-use elements everywhere.
- Beaver Builder won’t slow your site down like some other page builders.
- It’s really easy for you and your clients to update content on your site.
- A fantastic and friendly community is available to help you be a better Beaver!
- New add-ons and resources are being developed every day – extending your design capabilities even further.
You need WordPress version 3.5 and above and PHP 5.2.4 as a minimum to use the Beaver Builder plugin.
The Plugin
The plugin, otherwise known as a drag and drop page builder enables you to edit the content of pages on the front end of your website. You compose pages using rows and columns and you can move elements around the page by clicking and dragging them into desired positions.
The plugin comes with a series of content modules that you drag to the page allowing you to add elements like text, pictures, buttons, video and audio. All of this happens on the front-end of your site meaning you get to see how your pages look straight away without having to navigate back and forth between the back-end admin interface and the public facing side of your website.
Here’s Beaver Builder’s introductory video:
The Theme
The theme is optional – you don’t need it to make the plugin work and it comes with the Pro and Agency versions of the product.
The theme, like other WordPress themes, drives the whole look and feel of your site and gives you the ability to set the menu, header and footer styles and the fonts and colours used throughout your site. It allows you to set blog post page sidebar positions, featured image options, post and archive layouts and more, all controlled from within the WordPress Customiser.
The Beaver Builder theme is built to be 100% compatible with the plugin which is designed to work with any 3rd party theme. There are other themes that work well with the plugin. Genesis and GeneratePress Child themes are popular choices. We’ll cover themes in more detail in another post.
What does it cost?
Beaver Builder Lite
A ‘Lite’ version of the Beaver Builder plugin is available for free on the WordPress repository. It gives you access to the basic page builder and comes with the following features:
- Content Modules: HTML, Photo, Text Editor, Audio, Video, & Sidebar.
- Full-width, column-based layouts.
- Photo, colour, and video row backgrounds.
- Mobile-friendly, responsive layouts.
- Add your own CSS classes and IDs.
- Use WordPress Widgets and shortcodes.
- Works with Pages, Posts, and Custom Post Types.
Standard, Pro and Agency Versions
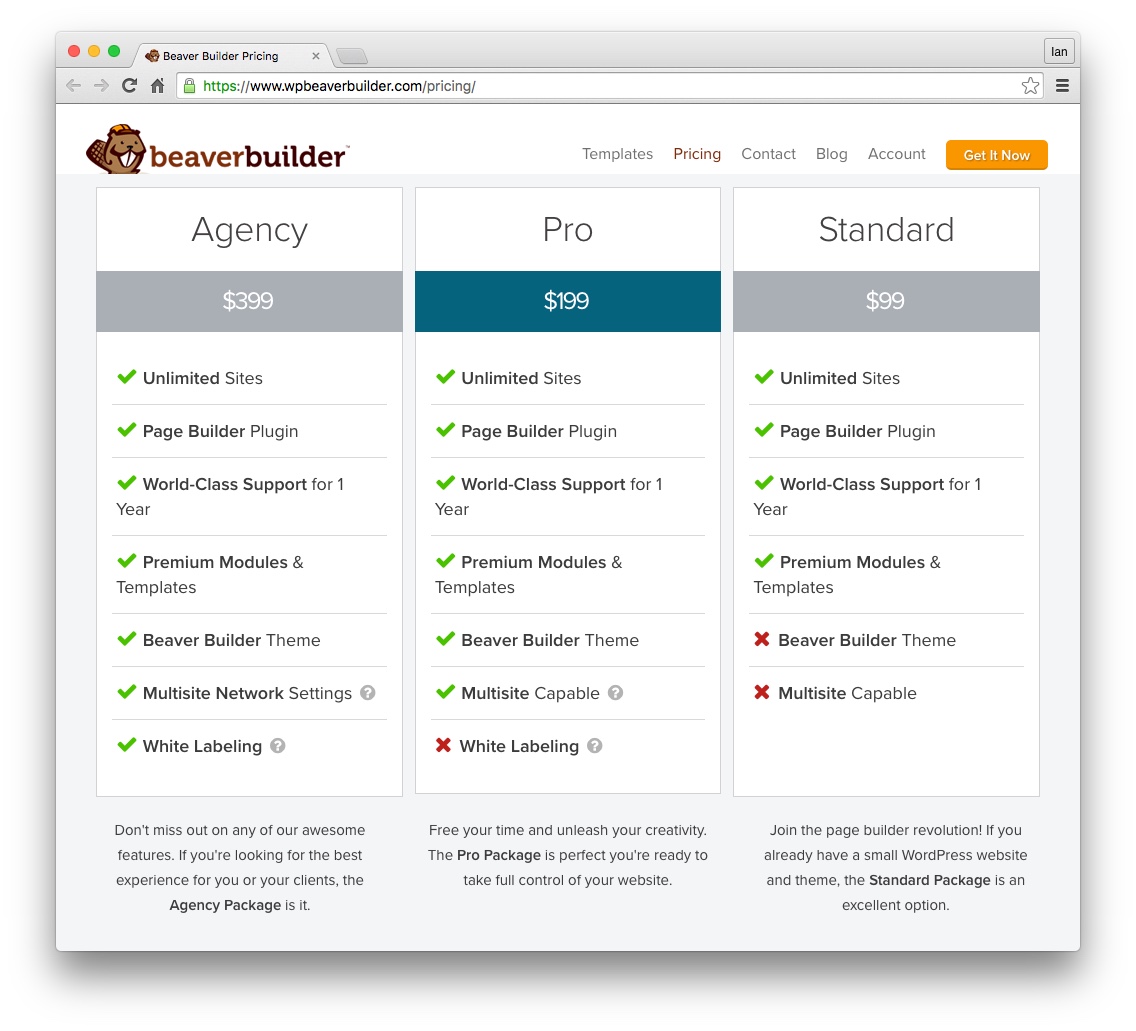
Beaver Builder comes in three price levels: Standard, Pro and Agency. You can see the prices and features here, but basically, the Standard is plugin only, whereas the Pro and Agency versions come with the Theme too. You can install the paid for plugin on as many sites as you like and the Pro and Agency versions work on WordPress Multisite setups.
The Agency version allows you to White Label the plugin to align with your own company branding. All of the paid versions give you access to additional premium modules, pre-designed templates and support from the Beaver Builder crew.
- Additional modules: Contact Form, Tabs, Slider, Pricing Table, Map, Blog Posts, Subscribe Form, Social Icons, and more.
- Beautiful pre-made layout templates.
- Save, export, and reuse full-page layouts, rows, and modules.
- Build your own custom modules
Setup the Beaver Builder plugin
You can buy the plugin from Beaver Builder or download the free Lite version from WordPress. To get it installed and setup, follow the advice on the Beaver Builder knowledge base page.

Install the free ‘Lite’ version of Beaver Builder from the WordPress repository
Once you have the plugin installed, you’ll notice a new section labelled ‘Page Builder’ in your WordPress admin Settings menu. This new settings area is the only backend administration area of the plugin you’ll see – the rest all happens on the front end of your site.

Settings for the Lite version of the Beaver Builder plugin

The pro versions add advanced modules to the Beaver Builder module settings tab
You’ll notice some differences in the free and paid for versions; there is a Licensing tab that replaces the Upgrade tab, there is an additional Templates, Icons and Help Button tab in the paid for versions and if you’ve bought the Agency version you’ll see a Branding tab.
The modules tab
The most important tab across all versions is the Modules tab. This is what drives the features available to you on the front end of your site. Using this panel, you can turn on or off the various standard and advanced modules as you need them. For this exercise, we’ll leave them all checked, or switched on.
The post types tab
The next most important tab is the Post Types tab – this tells Beaver Builder which post types you’d like to use the page builder with. By default, only pages are selected and if you have a standard WordPress install, you’ll see posts unchecked. It’s tempting to switch the builder on for all post types, but we recommend you only turn it on for pages first until you get a feel for the way the builder works.
Setup the Beaver Builder Theme
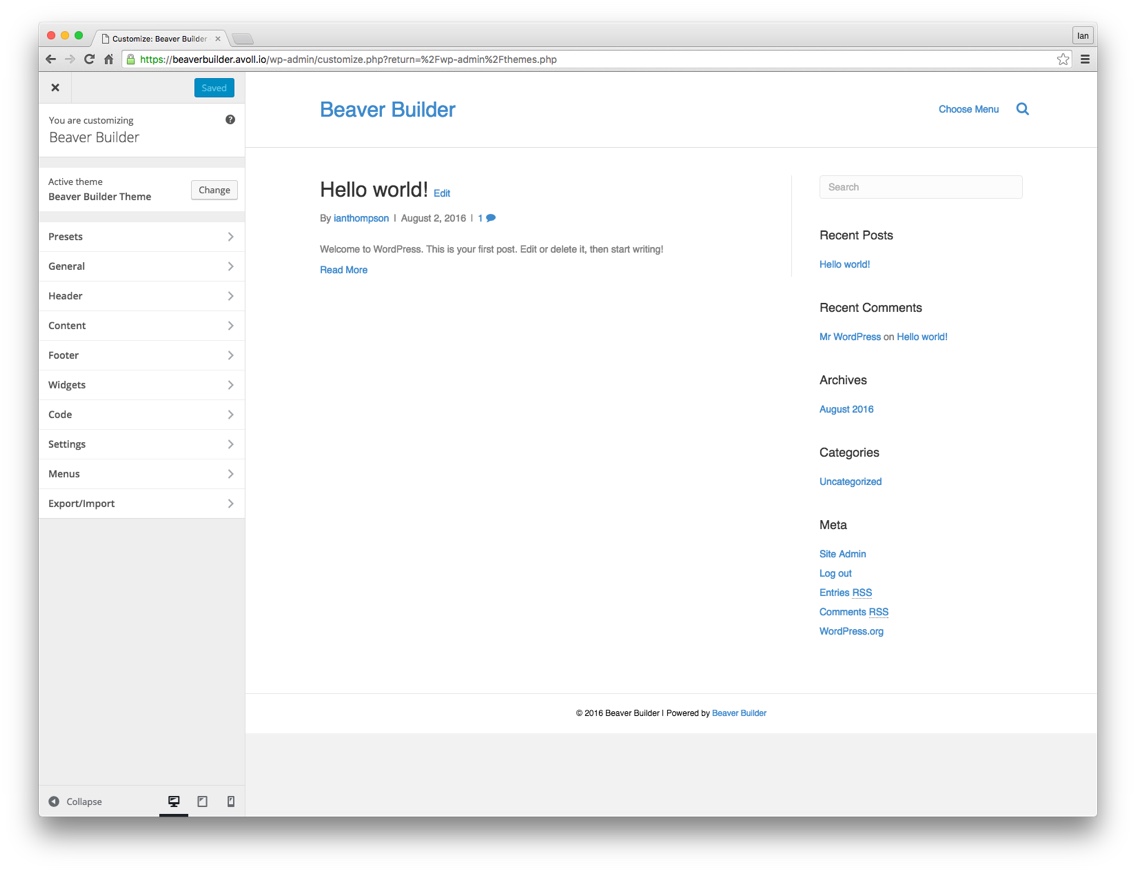
If you’ve bought the Pro or Agency package, you’ll also get access to the Beaver Builder theme. Download the theme from your Beaver Builder account and install it like you would any other WordPress theme. Activate it and then head over to the WordPress Customizer ( Appearance > Customize ) to access the theme settings. Things are going to look a little sparse at first but don’t worry, we’re about to change all that.
The first tab in the customizer gives you access to a series of Presets. These are default preset settings for the theme and you can play around and choose one that suits your style. (Hint – plenty more new presets are coming in the next theme update) Once you have a preset selected head over to the general tab and check out the settings there. One of the first things you can do to make your site unique is to choose from the available Google fonts in the Headings and Text tabs in the General settings.
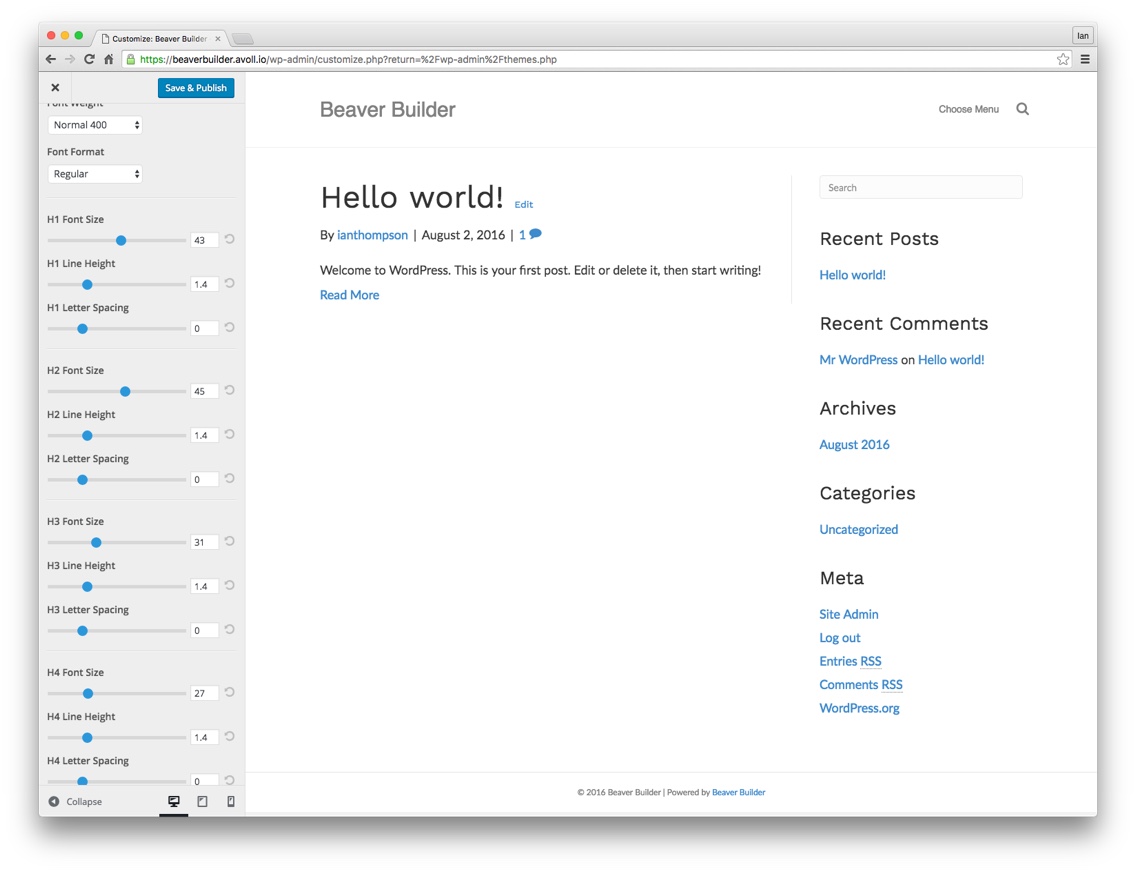
Playing around with the font options gives your Beaver Builder WordPress site an instant unique look
Likewise, playing around with the header settings and uploading a logo to the Header Logo tab immediately changes the look of your site. There are many Customizer options to play with and if you’d like to learn more about them, check out the articles on Beaver Builder’s new knowledge base.
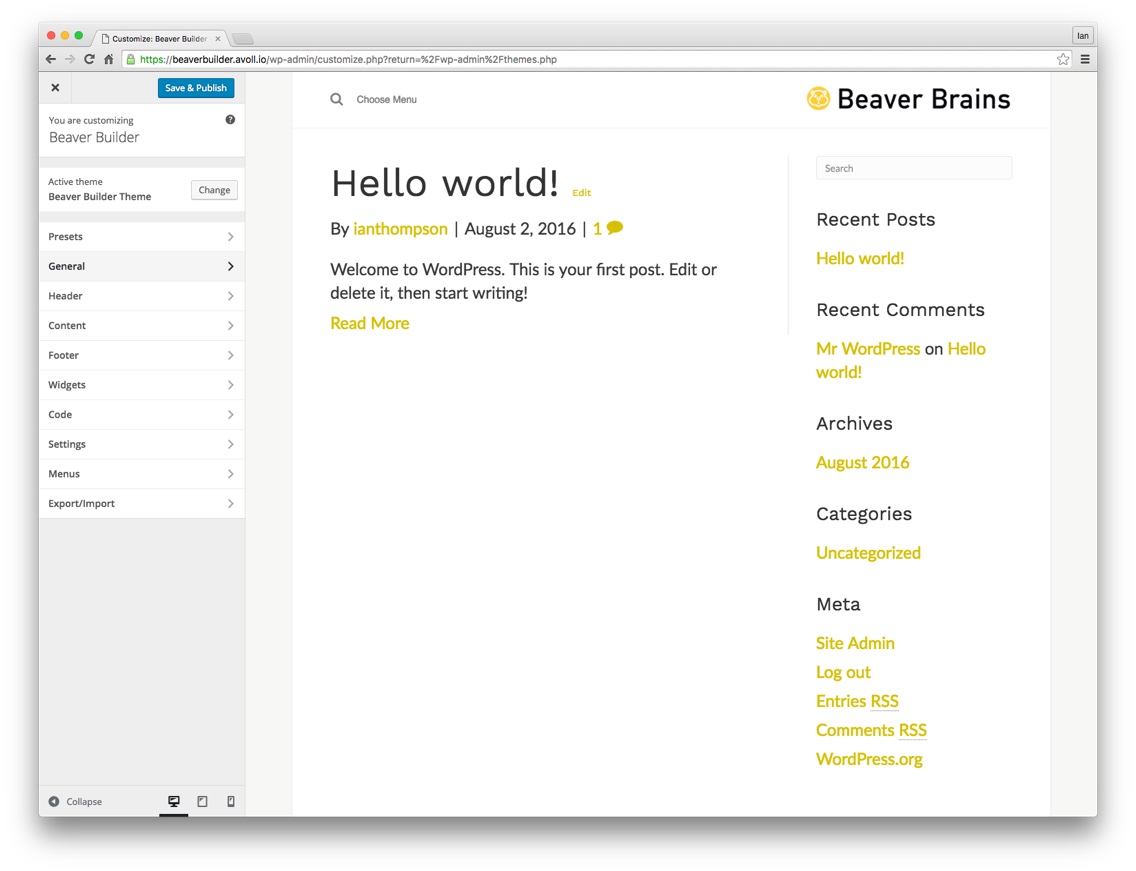
Quickly build a unique look and feel for your site using the Beaver Builder theme customiser
Front page editing
This is definitely where all the magic happens! Now that you have the plugin and theme installed let’s head to the homepage of our site and see how this thing works. Navigate to your homepage – or any page you like – and you’ll see in the WordPress admin bar along the top of your viewport, a new menu item called ‘Page Builder’. Click on that to activate the front end page builder. You can also access the page builder from the page menu, individual pages or the front end. Check out this video for more information and guidance on activating the page builder:
The first time you open the page builder, a dialogue will open asking if you’d like to take a tour – give it a spin to learn more. Once you’ve completed the tour, you’ll see a screen similar to this:

The page builder is activated and ready to start dragging modules.
You’re now ready to start dragging modules to your page – click and hold any module and drag it to the page to get started. Click the ‘Add Content’ button if the right-hand module panel closes, to add more content and more modules. Go Wild! Add photos, videos, headings and more. Play around with the advanced modules and see what you can build.
Drag the modules around the screen and reposition them – you can do that by clicking and holding the cross-hair icon on the very top left of every module. Click on a module to bring up the modal to edit the content. You can even copy modules on the page by clicking the copy icon on each of the modules. To find out what each module does refer to this guide.
You can use the pre-built templates in Beaver Builder if you’d like to start a standard layout design really quickly – this video shows you how:
The pre-built templates are great as they not only set up you page really quickly but they also illustrate finer settings like animation and row backgrounds. Try a few of the templates, each time overwriting the last to get a feel for how they work. We particularly like the Fullscreen template as a learning tool as it showcases animation, buttons, row background and more.
Once you’ve had a play with the modules and templates, click on the big blue ‘Done’ button to save your changes and admire your splendid creation!
Wrapping up
So that’s about all for this first post in our series and we hope this gives you a good overview of the Beaver Builder plugin and theme. There are many resources available and as we progress through the series you’ll see links appear in the right-hand sidebar. Follow these to discover even more knowledge and resources and if you get stuck you can always take a look at the Knowledge Base.
Our next post will delve a little deeper into advanced Beaver Builder usage including advanced modules, templates and global settings. Until then, be a better Beaver!
Subscribe
Subscribe to our blog posts to be notified just as soon as we hit that publish button!